
How the bloody hell did they do that? Unlock the Creative Genie lurking inside ...

Updated: Jul 10

Nikon z8, Nikkor 180-600mm lens, 1/5sec, F16, ISO32
I get it. You look at an artistic, creative bird image and think: how the bloody hell did they do that? When you start bird photography, you are so flat out trying to get a focused (non-butt) shot of the wee feathered flutterers that the concept of deliberate blur, over-exposure or abstract silhouette is like being a first year engineering student wondering how to build a space shuttle.
But don't panic. You don't need a degree in aerospace engineering to bridge the gap between a standard documentary shot and something you dare to call 'art'.
The bad news is that it will take some time to learn new techniques and develop an 'eye' and along the way you will take approximately 524,311 utterly terrible, completely DIABOLICALLY bad images (not an exaggeration).
The good news is that if you stick at it, and follow my tips below, you WILL get there.
So let's go get creative!
1. Master the Rules Before You Break Them
There is no shortcut. You cannot truly be creative until you have learned how to take a technically good bird photo. Yep - sorry - there is just no getting around knowing how to use your camera, getting a sharp, focussed shot and balancing that pesky, danged 'exposure triangle'.
Why? Because creative photography requires *intentionality*. If your image is blurry or blown out by accident, it’s just a bad photo. If it’s done on purpose, it’s art - even if not everyone 'sees' it (and trust me, judges will know the difference).
As the famous saying attributed to Pablo Picasso goes:
"Learn the rules like a pro, so you can break them like an artist."
To fully engage your creative brain, you first need to learn settings and your camera so well it all becomes second nature. As they say, 'Don't practice until you get it right. Practice until you can't get it wrong'. Why? Because, I'm afraid to tell you, your brain is just not that big. It can't manage a highly intensive technical thought process AND have spare capacity to think creatively.
When you can change settings without thinking (your 'habit brain'), your 'creative brain' is suddenly freed up to 'focus' (pun absoluuuutely intended) entirely on aesthetics and storytelling.
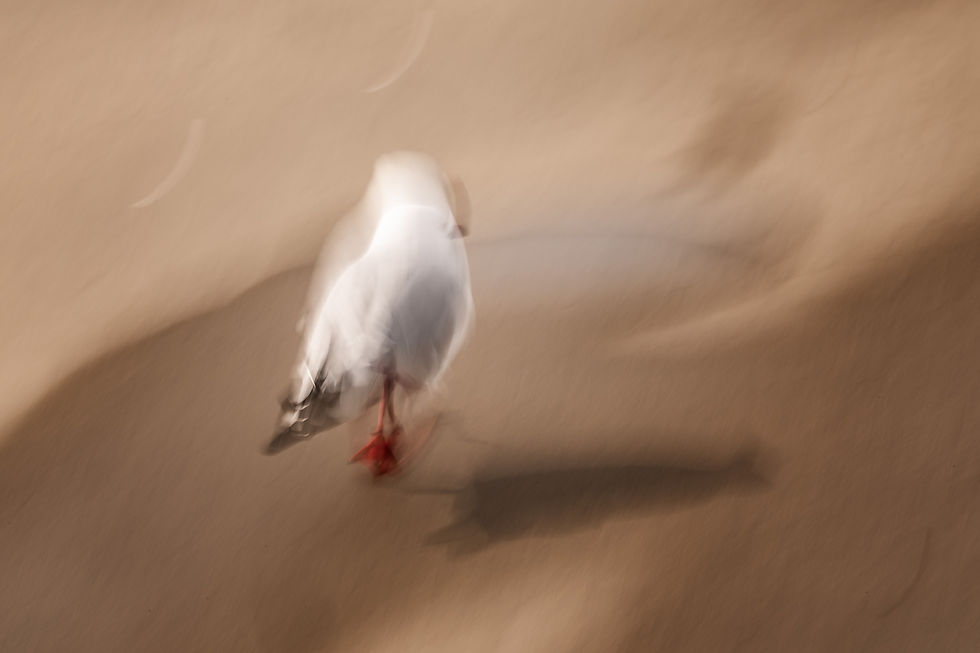
Nikon z8, Nikkor 180-600mm lens, 1/8sec, F32, ISO32
---
2. The Myth of the "Born Creative"
There is a pervasive myth that some people are simply born with a "creative gene" and others are destined to lifetime of taking images with as much aesthetic quality as a boiled carrot.
But guess what? It turns out that everyone is capable of being more creative.
In a NASA-funded study conducted by Dr. George Land, the creativity of 1,600 children was tested (and tracked into adulthood), and here's what they found:
at age five, **98%** of the children scored at the "genius level" for creativity.
by adulthood, that number had plummeted to just **2%**.
In other words, the vast majority of us don’t lack creativity; we've just had it beaten out of us (and as someone who worked in the law, I can attest to the complete absence of any creativity in any way shape or form in the workplace - or the people in it...).
So there you go. We all have creativity in us - we just have to go out there an refind it!

Nikon z8, Nikkor 180-600mm lens, 1/2sec, F14, ISO32
---
3. Exercising the Creative Muscle
Creativity isn't a fixed trait; I liken it to a muscle that needs to be exercised - the more you exercise it, the stronger it becomes. And we 'exercise' our creativity muscle by experimenting and pushing boundaries. Here is your training regimen:
Shoot in Manual Mode:** This is non-negotiable for creative work. Using an automatic or semi-automatic camera mode slows down technical learning. Shooting in manual mode not only dramatically speeds up the development of the 'habit brain', it also gives you maximum control over your equipment - you are telling the camera exactly what to do rather than letting the camera's algorithm deciding how the scene "should" look. Plus, many of the settings I use for my creative photography are so EXTREME that they would not be able to be achieved in a semi-auto mode (especially if constrained to +/- 3 stops Exp Comp).
Embrace "Spray and Pray" (With a Purpose):** Crank your camera to continuous high-speed shutter and let it rip. When you are experimenting with abstract motion or light, realize that 99.99999% of your shots will look absolutely terrible. That is normal.
Learn to Fail:** If you aren't failing, you aren't pushing hard enough. Failure is just data telling you how to adjust for the next frame. Failure is critical to learning and growth. Push your camera to the limits and see what happens.
Immerse Your Visual Palette:** Spend time looking at artistic bird images by photographers you admire, visit art exhibitions and check out awarded images in artistic photo competitions (of any genre). By immersing yourself in high-quality art, you will subconsciously develop an "eye" for what is artistic and aesthetically pleasing - trust me on this.
This stage will take time—many months of trial, error, and trial again. But the more you do it, the stronger your creativity muscle will get, the quicker your instincts will sharpen, and the more artistic and unique your images will become.
4. Three Techniques to Kickstart Your Creative Journey
To help you on your way, I have set out below three simple 'creative' bird photography techniques. Practice these and watch a new world of bird photography open up before you. So exciting.
High-Key Bird Photography
High-key imagery is all about bright, ethereal, minimalist vibes. By intentionally over-exposing the scene, you can turn an otherwise dull image into something resembling a clean ink painting - as well as eliminate any distracting backgrounds.
```
Find the Light: Look for a bird against a bright, overcast sky, or sitting on water that is reflecting sunlight. The key here is that the background must be several stops of light BRIGHTER than the bird.
Push the Exposure: Make the image as bright as possible without overexposing the bird. Because the background is brighter than the bird, it should become completely white (overexposed).
Note: if using a DSLR, take a test image and review it on the LCD. Enable the blinkies (highlights alert)- if your 'blinkies' - highlights alert- flash red on everything except the bird you have nailed it! If using mirrorless, you should be able to see changes you make in 'real time' as you take the photo (be careful as most electronic viewfinders do not show changes beyond +/- 3 stops exp comp).

Example of High Key
Nikon z8, Nikkor 180-600mm lens, 1/250sec, F6.3, ISO5000

Example of High Key
It was a bright sunny day but the birds were in the shade of a tree.
Nikon z8, NIKKOR Z 600mm f/4 TC VR S Lens + 1.4 teleconverter (Courtesy of Nikon Australia), 1/500sec, F11, ISO5000
Low-Key Bird Photography
The exact opposite of high-key, low-key photography is moody, dramatic, and shrouded in darkness. You are exposing strictly for the highlights, plunging the rest of the frame into deep, black shadows.
```
Find the Contrast: Look for a bird in a bright pocket of direct light (like a spotlight), while the background behind it is in deep shadow (like the dark foliage or the shadows of a cliff face). The key here is that the background must be several stops of light DARKER than the bird (I've taken images at negative 5-8 stops EV). The bigger the difference in light, the more effective the technique.
Drop the Exposure: Expose for the bird, ensuring that you do not overexpose any part of it. Because the background is darker than the bird, it should become completely black (underexposed).
Note: take a test image and review it on the LCD. Enable the blinkies (highlights alert)- ensure that no part of the bird is overexposed.

Example of Low Key
Canon EOS-1D X, 100-400mm lens, 1/1000sec, F5.6, ISO800

Example of Low Key
Canon EOS-1D X Mark II, Canon 600mm F 4 lens, 1/5000sec, F5.6, ISO160
Slow Shutter Panning (Flying Birds)
This technique conveys the raw, chaotic energy of speed. The goal is to keep the bird’s head relatively sharp while the wings and the background melt into a painterly, motion-blurred streak.
```
1. Slow Down the Shutter: Drop your shutter speed down to between 1/8s and 1/30s (with 1/15sec being a sweet spot).
2. Match the Speed: Choose a bird flying parallel to you against a textured background (like trees or reeds—pure blue sky won't show motion lines and is, quite frankly, pretty danged boring).
3. Track and Pan: Lock your focus on the bird as far out as you can, and then fluidly pan your camera at the same speed as the bird's flight. This will take practice to get it right.
4. Fire a Burst: Keep panning smoothly as you press the shutter, firing a continuous high-speed burst to maximise your chance of getting 'the shot'. Keep practicing - when your panning motion matches the bird you'll get shots like the ones below.

Example of horizontal pan
Nikon z8, Nikkor 400mm lens with 1.4x teleconverter, 1/8sec, F7.1, ISO50

Example of vertical pan
Nikon z8, Nikkor 180-600mm lens, 1/5sec, F36, ISO32
---
The Final Frame
Stepping away from the safety of a sharp, bird ID type shot is terrifying at first. But once you give yourself permission to mess up, throw out all the rules and play with light and motion, you stop being just a documenter of nature - You become an artist.
Now get out there, switch to manual, and go make some glorious mistakes!


Comments